 storagearts.com ```html
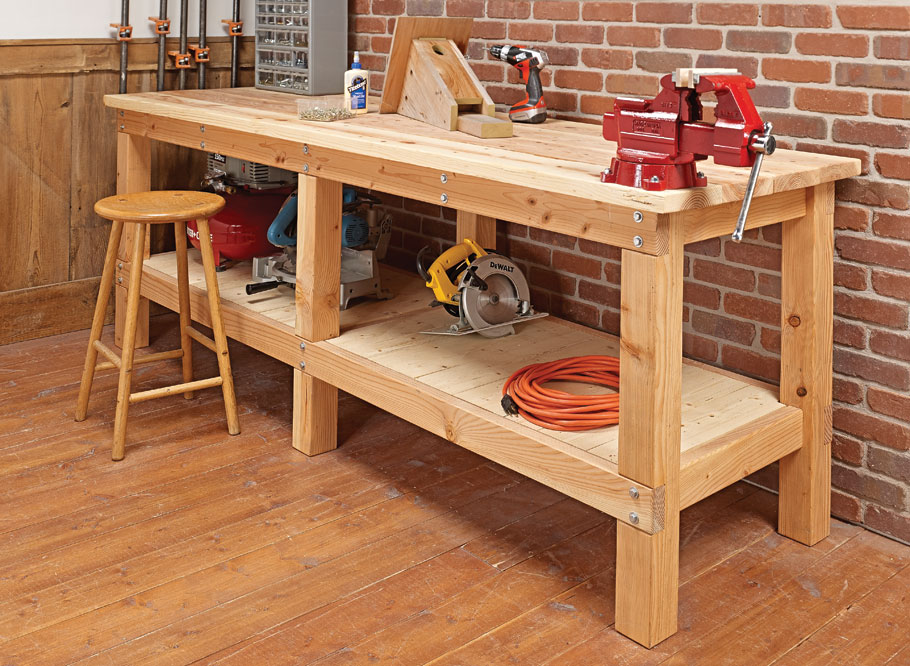
 Introduction: A Workbench Revolution Building a workbench is a rite of passage for any DIY enthusiast. But why settle for basic when you can create a super-functional workbench with built-in tool storage? This post guides you step-by-step through constructing a robust 175+ cm (approximately 70 inches) workbench that keeps your tools organized and readily accessible.
Materials and Tools: Gearing Up for Success Before you begin, gather these essential materials and tools: Lumber: Select sturdy wood like 2x4s, 4x4s, and plywood (3/4 inch thick for the top, 1/2 inch for shelving/storage). Quantity depends on your exact design, but a rough estimate includes several 8-foot 2x4s, two 8-foot 4x4s, and at least one sheet of plywood. Fasteners: Screws (various lengths), nails, wood glue. Hardware: Drawer slides (if adding drawers), hinges (if adding cabinet doors), pulls/knobs, pegboard (optional for back panel). Tools: Circular saw or table saw, miter saw, drill/driver, measuring tape, level, square, safety glasses, ear protection, pencil. A pocket hole jig is highly recommended for strong joinery.
Step 1: Planning Your Workbench Design It's crucial to have a clear plan. Sketch out your workbench design, including dimensions (aim for 175+ cm length, 60-75cm width, and comfortable working height). Decide on the number and placement of drawers, shelves, and any other storage features. Consider adding a back panel with pegboard for hanging frequently used tools. This planning stage saves time and prevents mistakes later.
Step 2: Building the Frame Cut the 4x4s to the desired leg height. Cut the 2x4s for the top and bottom frame supports. Use pocket hole joinery or traditional screwing techniques to assemble the frame. Ensure it's square and level. Add additional 2x4 supports across the frame to reinforce the top and provide attachment points for the plywood top. Space these supports approximately 40-50 cm apart.
Step 3: Creating the Workbench Top Cut the plywood to the dimensions of the workbench top. Apply wood glue to the frame supports and position the plywood on top. Secure the plywood to the frame with screws, ensuring they are countersunk to avoid protruding. Consider adding a second layer of plywood for extra durability and a smoother working surface.
Step 4: Constructing Storage Drawers and Shelves For drawers: Build the drawer boxes from plywood or solid wood. Use dado joints or rabbet joints for added strength. Install drawer slides on the drawer boxes and the workbench frame. For shelves: Cut plywood to the desired shelf dimensions. Attach them to the frame using screws and wood glue. Consider adding adjustable shelf pins for flexibility.
Step 5: Adding a Back Panel (Optional) Cut a piece of plywood to the desired size for the back panel. Attach the back panel to the frame using screws and wood glue. Install pegboard on the back panel for hanging tools.
Step 6: Finishing Touches Sand all surfaces smooth to remove any splinters or rough edges. Apply a finish to protect the wood and enhance its appearance. Options include polyurethane, varnish, or paint. Install hardware such as drawer pulls, knobs, and hinges.
Conclusion: Your Personalized Workspace Congratulations! You've successfully built a custom workbench with built-in tool storage. This personalized workspace will significantly improve your efficiency and organization for future DIY projects. Remember to adjust the design and features to best suit your individual needs and preferences. Enjoy your new workbench!
``` A Mobile Workbench With Builtin Tool Storage Compartments
 www.freepik.com
 Maximizing Workspace With Tool Storage
 storagearts.com
 A Mobile Workbench With Builtin Tool Storage Compartments
 www.freepik.com
  woodworkingmaya.blogspot.com ```html
  www.woodpeck.com
  woodarchivist.com
  www.etsy.com
  www.etsy.com
  www.etsy.com
  instaloverz.com
 /rustic-6-57ec3fad3df78c690f89772e.jpg) www.thespruce.com
www.thespruce.com  www.homestratosphere.com
  woodworkingplans-pdf.blogspot.com
  4woodworking-supplies.blogspot.com
  woodworkingplansmadeeasy.com
  www.woodsmithplans.com
  www.mysql.com
  www.familyhandyman.com
  www.custommade.com
  www.etsy.com
  www.etsy.com
  www.pexels.com
  ashwoodworking.co
  www.popularwoodworking.com
  www.grainger.com
 /carpentry-workshop-510332944-57cee3955f9b5829f405dd43.jpg) woodworking.about.com
woodworking.about.com  wallpaperaccess.com
  www.gatby.com
  droplr.com
  www.bottomlineinc.com
  restless.co.uk ```html
  www.popularwoodworking.com
  learnwoodworkingnow.com
 :fill(transparent,1)/carpentry-workshop-510332944-57cee3955f9b5829f405dd43.jpg) thewoodplankers.blogspot.com
thewoodplankers.blogspot.com  www.pinterest.com ```html
  www.etsy.com
  www.etsy.com